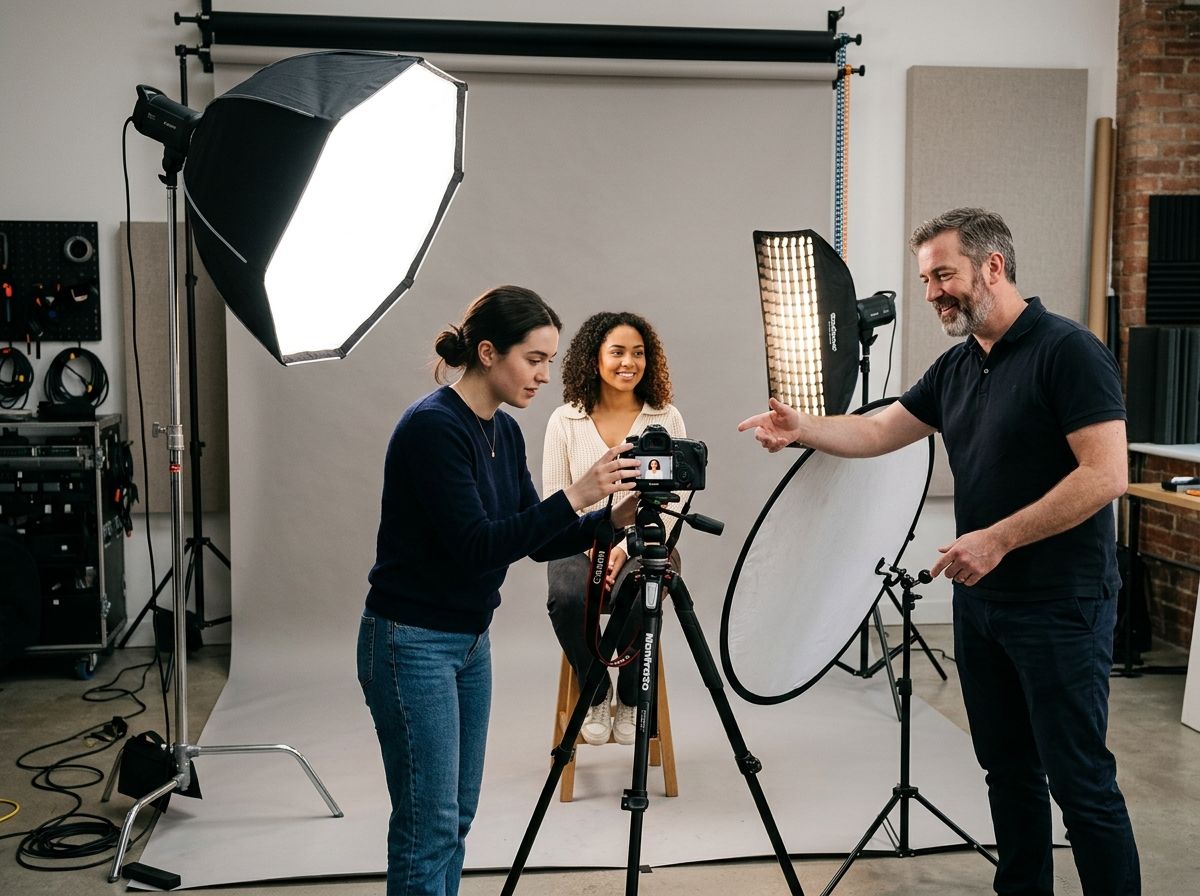
If you’re trying to get your head around photography lighting basics, here’s where to start: every photo you take is shaped by three things, the quality of the light (hard or soft), its direction (where it’s coming from), and its colour (warm or cool). Once you can read those three factors in any scene, you can improve almost any photo without spending a penny on gear.
This guide covers natural and artificial light, the classic three-point setup, common portrait lighting patterns, and what to actually buy first if you’re ready to invest in kit, with current UK prices so you’re not guessing.
What are the basics of photography lighting?
Photography lighting basics come down to controlling three variables: quality, direction, and colour. Quality means whether the light is hard (small source, sharp shadows) or soft (large source, gentle shadows). Direction means where the light hits your subject relative to the camera. Colour refers to the light’s temperature, measured in Kelvin, which shifts from warm orange to cool blue depending on the source.
Everything else, from softboxes to golden hour to flash settings, is really just a tool for adjusting one of those three things. Once that clicks, gear choices get a lot easier to understand.
Natural light vs artificial light
Natural light
Natural light is free, and it’s the best place to start learning. It changes constantly through the day: early morning and late afternoon light is warm and low in the sky, producing longer, softer shadows, while midday sun is harsh and directly overhead, which is why portraits taken at noon often look unflattering with dark eye sockets and hard shadows under the nose.
The period around sunrise and sunset, often called golden hour, gives warm, soft, directional light that’s popular for portraits and landscapes. On an overcast day, cloud cover acts like a giant softbox, spreading light evenly and reducing shadows almost entirely, which is genuinely one of the best conditions for portrait work even though it doesn’t look dramatic to the naked eye.
Artificial light: continuous vs flash
Artificial light splits into two categories. Continuous lighting, such as LED panels, stays on the whole time, so what you see is what you get, which makes it easier for beginners to learn with since you can move it and watch the shadows change in real time.
Flash (also called strobe) fires a short, intense burst of light. It’s more powerful for its size, freezes motion well, and doesn’t heat up a room the way continuous lights can, but it takes more practice since you can’t see the exact effect until after you’ve taken the shot, unless your flash includes a modelling lamp.
Hard light vs soft light
This is one of the most useful distinctions in photography lighting basics, and it comes down to the size of the light source relative to your subject, not its brightness. A small, distant source, like direct sun or a bare flash, creates hard light with sharp-edged shadows. A large, close source, like an overcast sky or a big softbox held near your subject, creates soft light with gentle, gradual shadows.
You can turn almost any hard light source soft by making it bigger or bringing it closer: bounce a flash off a white ceiling, shoot through a diffuser, or move your subject nearer to a window. This single trick solves more lighting problems than any piece of equipment you could buy.
Direction of light
Where the light comes from changes the whole mood of a photo:
- Front lighting places the source directly in front of the subject, evenly lighting the face with shadows falling behind. It’s flattering and easy but can look flat.
- Side lighting comes from 90 degrees to one side, creating strong shadows that reveal texture and add drama, often used in moody portraits.
- Backlighting puts the source behind your subject, creating a silhouette or a glowing rim of light around the edges if you expose for the subject rather than the background.
- Top lighting comes from directly overhead, similar to harsh midday sun, and tends to create unflattering shadows under the eyes and chin unless deliberately used for effect.
The three-point lighting setup
Three-point lighting is the classic starting formula taught in every photography and film course, and it’s worth learning even if you eventually break the rules. It uses three lights, each with a specific job.
The key light is your main light source and sets the overall exposure and mood, usually placed at an angle of around 30 to 45 degrees from the camera. The fill light sits on the opposite side, softer and less powerful, and its job is to lighten the shadows the key light creates rather than eliminate them entirely. The back light (or rim light) sits behind the subject, separating them from the background by adding a subtle edge of light along their hair or shoulders.
You don’t need three actual lights to use this principle. A single flash as your key, a white reflector as your fill, and a window behind your subject as your back light will do the job just as well when you’re starting out.
Common portrait lighting patterns
Once you understand three-point lighting, these classic patterns are worth recognising, since you’ll see them referenced constantly in tutorials and behind-the-scenes shots:
- Rembrandt lighting creates a small triangle of light on the shadowed cheek, achieved by placing the key light at around 45 degrees and slightly above the subject.
- Split lighting lights exactly half the face, leaving the other half in shadow, and suits dramatic or moody portraits.
- Butterfly lighting places the key light directly above and in front of the face, creating a small shadow under the nose shaped like a butterfly, a classic look for beauty and glamour photography.
- Loop lighting sits between Rembrandt and butterfly, producing a small shadow that loops from the nose without touching the cheek shadow, generally considered one of the most universally flattering setups.
Colour temperature and white balance
Light isn’t just bright or dim, it has a colour, measured on the Kelvin scale. Candlelight sits around 1,900K and looks very orange. Household tungsten bulbs run around 2,700 to 3,000K, also warm. Daylight sits around 5,500 to 6,500K and looks neutral to blue, while open shade or an overcast sky can push past 7,000K, looking distinctly blue.
Your camera’s white balance setting corrects for this, either automatically or manually if you know the Kelvin value of your light source. Mixing light sources with different colour temperatures in one shot, such as daylight from a window alongside tungsten room lighting, creates uneven colour casts that are hard to fix later, which is why professional photographers often turn off ambient room lights when shooting near a window.
Modifiers: softboxes, umbrellas and reflectors
Modifiers change the quality or direction of your light without changing the light source itself.
A softbox is a fabric enclosure that fits over a flash or continuous light, softening and shaping the output, and remains the most common modifier for portrait and product photography. A shoot-through umbrella does a similar job more cheaply and packs down smaller, though it scatters light less predictably than a softbox. A reflector, often a simple collapsible disc, bounces existing light back onto your subject rather than adding a new source, and is one of the cheapest, most useful tools a beginner can own. Reflectors typically come in white (subtle fill), silver (brighter, slightly cooler fill), and gold (warm fill), with a black side for the opposite job of subtracting light and deepening shadows.
Building a beginner lighting kit: what to buy first
You genuinely don’t need to spend anything to start learning, since natural light and a £15 collapsible reflector will teach you most of what matters. When you’re ready to add artificial light, here’s a sensible order, with current UK price ranges from retailers like Wex Photo Video, Jessops, and Amazon UK. Prices change often, so treat these as a guide rather than a quote.
- A 5-in-1 reflector (around £15 to £30) gives you control over natural light before you spend anything on flash.
- A basic manual speedlight, such as a Godox TT600, typically costs around £60 to £75 and is a genuinely capable entry point rather than a toy.
- A softbox or umbrella for your speedlight, plus a stand, usually adds another £40 to £60 to your setup.
- A second flash and a wireless trigger lets you build a proper two-light setup once you’re comfortable with one, often adding £80 to £120 depending on the trigger system you choose.
Common beginner mistakes
New photographers tend to repeat the same handful of errors. Placing the light too far from the subject makes it act harder than intended, even from a large modifier, since distance shrinks the effective size of any source. Mixing light sources of different colour temperatures without correcting white balance is another common trap, producing orange or green colour casts that are difficult to fix afterwards.
Overpowering the ambient light is also common: a flash set far too bright compared to the room around it produces a harsh, obviously artificial look, whereas balancing flash power against the existing light usually looks more natural. Finally, ignoring the background is easy to do when you’re focused on your subject’s face, but a bright window or a cluttered wall behind them can pull attention away from the shot entirely.
FAQs
What are the three basics of photography lighting?
The three basics are quality (hard or soft), direction (where the light comes from relative to your subject), and colour (its temperature in Kelvin). Learning to read all three in any scene is the foundation for improving your photos, with or without extra gear.
Is natural light or artificial light better for beginners?
Natural light is the best place to start because it’s free and teaches you to see light direction and quality without technical settings getting in the way. Overcast days and the hour after sunrise or before sunset are particularly good conditions to practise with.
What is three-point lighting?
Three-point lighting uses a key light for overall exposure, a fill light to soften shadows, and a back light to separate the subject from the background. It’s the standard starting setup taught in photography and film courses, though you can approximate it with just one flash and a reflector.
What’s the difference between hard and soft light?
Hard light comes from a small or distant source and creates sharp-edged shadows, while soft light comes from a large or close source and produces gentle, gradual shadows. You can soften almost any hard light by making the source bigger or moving it closer to your subject.
Do I need a softbox to start with flash photography?
No, a shoot-through umbrella does a similar job for less money and is a common first modifier, though a softbox gives you more control over where the light spreads. Either works fine for learning the fundamentals before you invest more.
What is Rembrandt lighting?
Rembrandt lighting is a classic portrait pattern where the key light sits at roughly 45 degrees and slightly above the subject, creating a small triangle of light on the shadowed cheek. It’s named after the painter, who used similar light in many of his portraits.
How much does a basic lighting kit cost in the UK?
A workable beginner kit, including a reflector, a manual speedlight, and a softbox or umbrella with a stand, typically costs somewhere between £115 and £165, based on current pricing at UK retailers such as Wex Photo Video and Amazon. Prices vary by brand and often change, so it’s worth comparing before you buy.
Why do my indoor photos look orange or yellow?
This usually happens when your camera’s white balance is set for daylight but you’re shooting under tungsten or warm LED bulbs, which sit much lower on the Kelvin scale. Switching your white balance to tungsten or setting a custom Kelvin value in camera usually corrects it.